So how exactly do I get that in game?
Part 1, how to get the layers out of the Gameneeded tools:
I'm not going into unpacking the field file, but make sure you have it extracted, giving 'itmin2'
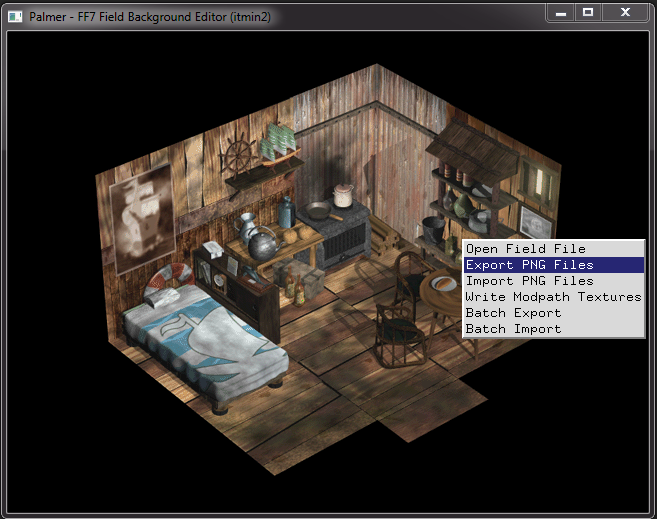
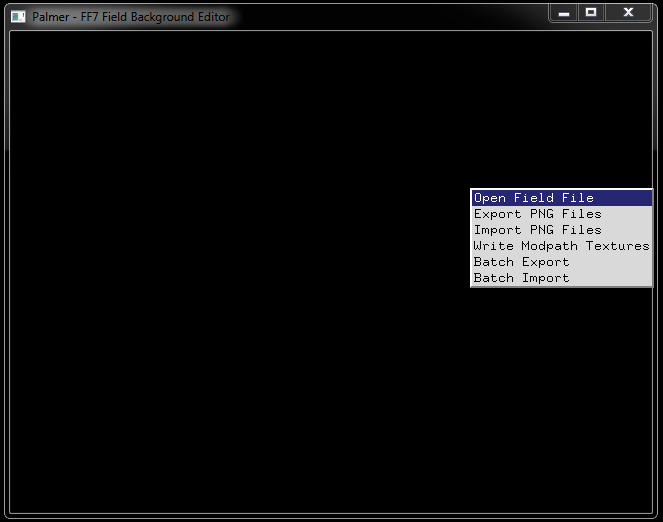
now open Palmer,
left click on the window, select open field file and select the extracted field file.
If all goes well, the scene should be shown on screen.
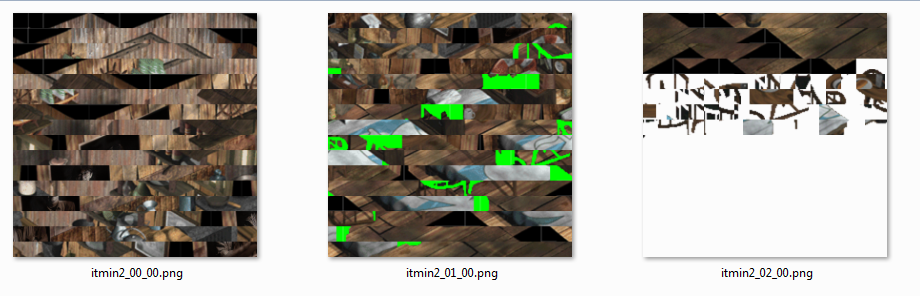
once again left click on the screen and select 'Export PNG Files'
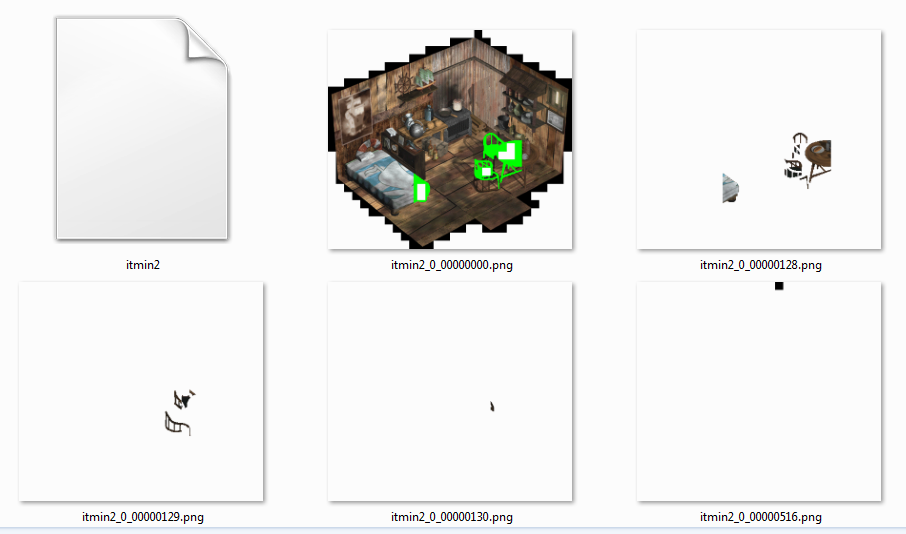
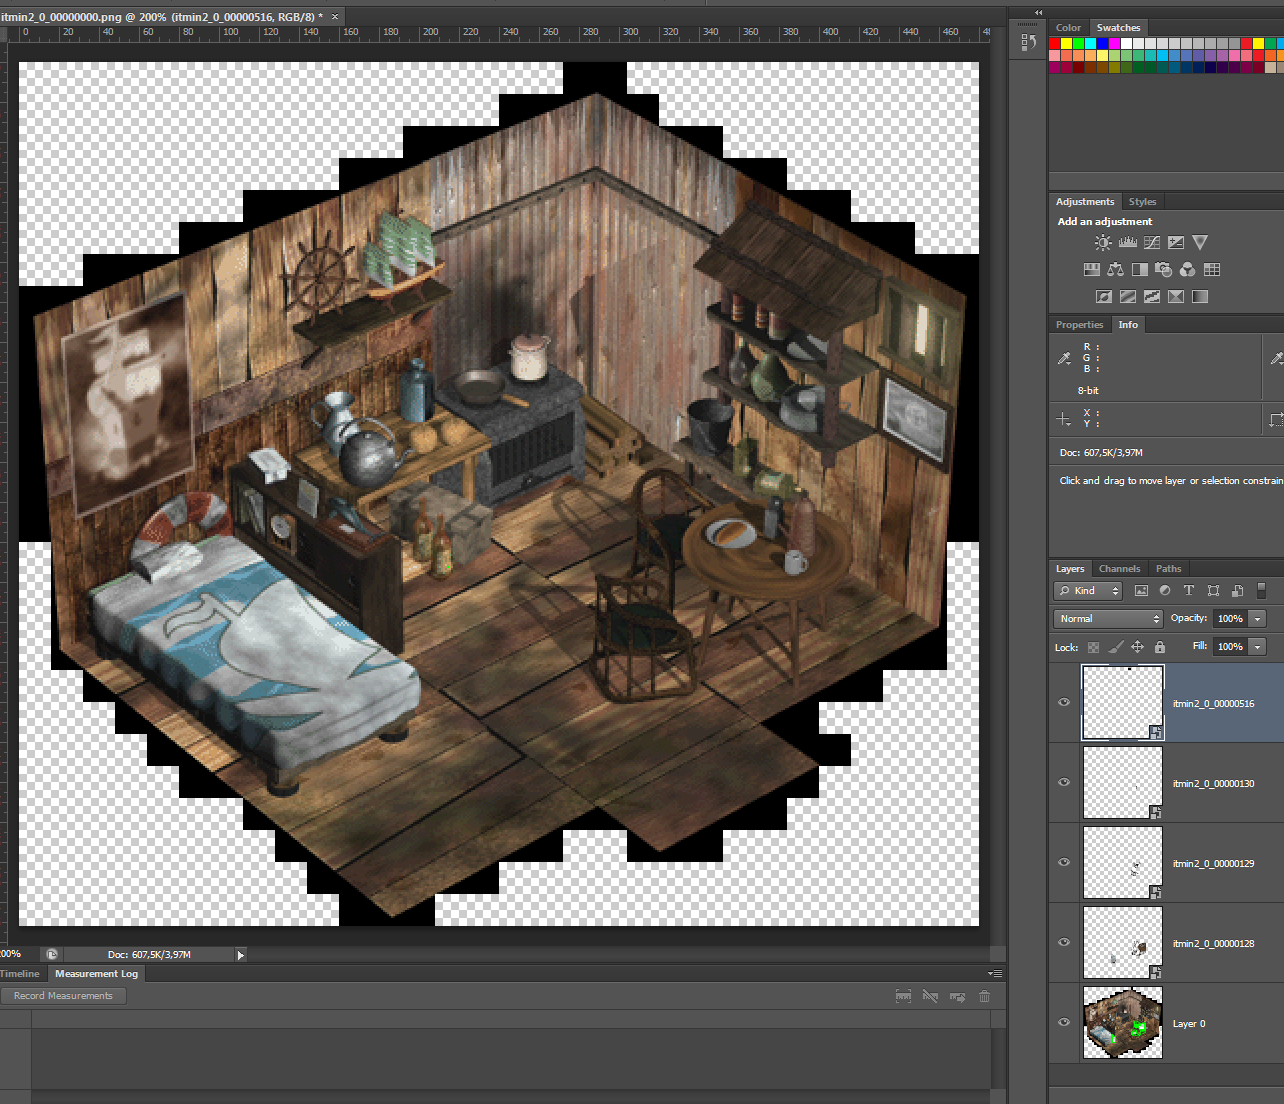
now you'll end up with several files;
- itmin2_0_00000000.png
- itmin2_0_00000128.png
- itmin2_0_00000129.png
- itmin2_0_00000130.png
- itmin2_0_00000516.png
These are the different layers of the field file.
Now what you have to do is to recreate these specific files (with higher resolutions of course

)
Part 2, how to get the new layers into the GameMake sure to have the above images in the correct naming in a single directory.
Make sure there are no underscores in the directory names.
now open Palmer,
left click on the window, select 'import PNG files' and select the newly created png files.
If all goes well, the scene should be shown on screen, otherwise play around with the right click menu and turn layers on and off.
If all new files are loaded, once again left click on the screen and select 'Write Modpath Textures'
now you'll end up with several files;
- itmin2_00_00.png
- itmin2_01_00.png
- itmin2_02_00.png
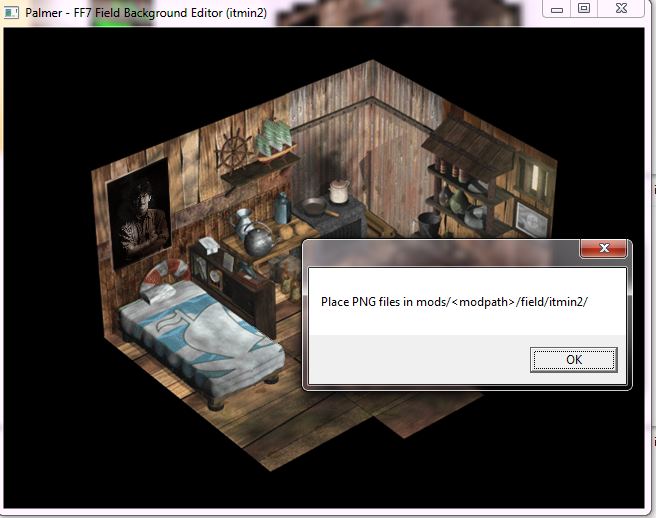
These are the files which should be placed in the modpath, in this example:
mods/<modpath>field/itmin2/ (Palmer will tell you this also...)
If the above has been completed, fire up FF7 (it's usefull to have a savefile with a save located close to the field) and go to the field.
Basically that's all there is to it.
(there might be some catch with the bit-depth of the png's, but don't remeber that exactly anymore)I hope this helps, otherwise I might fill this up later with some screenshots if needed/wanted.

[edit:field file and png's are uploaded in the repo under
Original Models (Reference) under the name Tut.zip]


 )
)